Adding and Editing User Defined Fields
User Defined Fields allow Clients to configure pre-defined custom fields with values that capture additional information related to the work that their Employees are doing. This may be information that the Agency or their Client would like to gather, and it can be entered by Employees in WTE, Approvers in the Time Approval application, and BTE Admin/TMC users on the time card screen. This functionality allows our Clients a lot of flexibility to track different values important to their business. In many cases, we also pass back UDF values in client pay files.
The configuration can be for all Assignments within a Group/Branch or for all Assignments within a specific Client within a Branch. In order to be available, there is a flag on the Group edit (tc..tblclientgroups) called ‘Allow User Defined Fields’ which must be checked. Once this setting is on, UDFs can be configured at the Agency-level in the TMC by going to Maintenance > Administration > User Defined Fields (not in the Template Group or within a specific Branch)
Some UDF Examples:
-
Agency wants to capture daily Employee comments
-
A Law Office may want Employees to enter case numbers
-
A financial institution may want Employees to enter specific cost center number
BH1 Clients should use Customer Required Fields (CRFs). Refer to Customer Required Fields documentation in the KB for more information.
Restrictions
-
BH1 does not support UDFs - they are not included in the Billing Sync message to Pay/Bill
Discovery Questions
-
Who does this UDF apply to? Who has the need for this?
-
All Assignment across the Agency?
-
A specific Client? All Assignments within the specific Client? A specific Worksite within that Client? A specific Branch within that Client?
-
-
What is the template? What is the information that needs to be captured?
-
Drop Down Value: if it's a specific type of user field, do they have a select option list?
-
Who will be entering the UDF values: Employee/Approver/Admin ?
-
Default - allow all so that the Employee can enter, the Approver can modify, and the Administrator can edit as well

Configuration
-
Enable UDFs at the Branch-Level:
Ideally, this step is completed on the Template Group prior to actual Branches being created so that the setting copies down to all newly created Branches
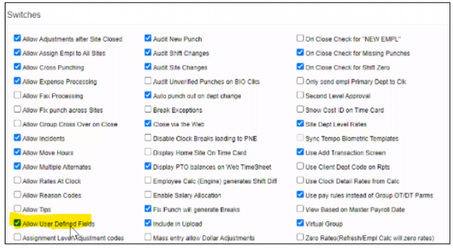
Go to Branch > Edit > Switches > check Allow User Defined Fields
-
Create the UDF Template at the Agency-Level:
-
From the Agency/Client Level screen, go to Maintenance > Administration > User Defined Entry Fields
-
Do not go into Template Group or a specific Branch
-
-
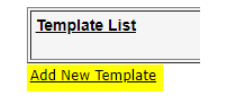
Add New Template - The template is a placeholder that can be assigned for use at the Branch or Client-level. The template holds the UDF fields that are configured for use in WTE, time approval and the TMC. You can have one or multiple templates containing different sets of UDF values, which can be assigned to respective Branches or Clients. But only one template can be assigned to a Branch or Client, so all necessary fields must be included in the assigned template.
-
From the Template List, click Add New
Template Fields
-
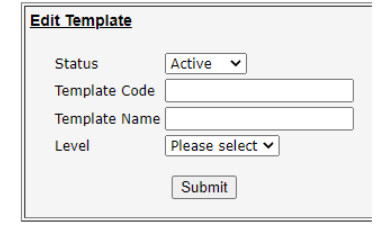
Template Code/Template Name - these can be the same - typically placeholder values so that users know which template to assign once created
-
Template Code is may be used to assign a particular UDF template to an Employee based on a value sent in their refresh file (RDRM uses it)
-
-
Level - Employee, Assignment, or Transaction
-
Transaction - use with Clock Groups only
-
This simply means that a UDF value can be entered on the TMC time card at each individual In/Out level. For example, if an Employee worked 8am to 12pm and 1pm to 5pm, those are two separate transactions, which can each have their own UDF values
-
We do not currently support In/Out transaction level UDFs, so do not use with WTE
-
-
Assignment - typically used with WTE Groups - the UDF can be made available at the Assignment level
-
Employee - only used by one Client HSS Staffing (HSSS). However, the result seems to be the same as Transaction level, as Transaction level entry is allowed on the time card even with Employee level is set on the Template
-
-
-
Click Submit.
-
-
-
Configure the UDF Template:
-
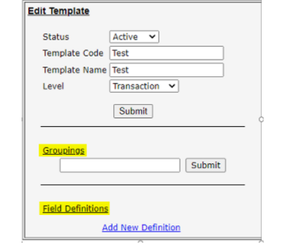
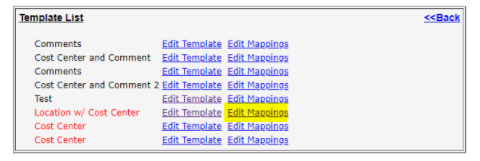
From the Template List, click Edit Template - configure how the UDFs are displayed and the actual fields that are available for entry
-
Groupings - If there are fields that should be grouped together in the UDF display, enter a Grouping name and click Submit.

-
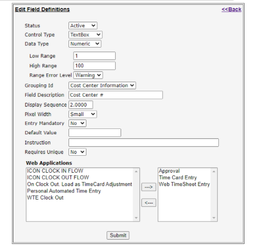
Add Field Definitions :
-
Click Add New Definition to add an actual field (ie. in the above screenshot, the Comments field)
-
Control Type - Textbox (free form field) or Dropdown (pre-defined list of options available to select)
-
Data Type - Character (alphanumeric) or Numeric (numbers only)
-
Character - can set limit
-
Numeric - can set Low Range/High Range - if user enters anything outside of this range, a warning appears
-
-
Grouping ID - can assign the field to a Grouping, so that certain field definitions are displayed together in the Employee’s view (see above)
-
Field Description - the actual field name that will appear as the header for the UDF (ie. Work Information in the screenshot above)
-
Display Sequence - allows for ordering the different field definitions within a Grouping (number as 1, 2, etc.)
-
Pixel Width - adjusts the size of the field (primarily to improve the employee view in Harmony and user view in TMC, depending on the amount of text typically needed to fill in the UDF value
-
Entry Mandatory - can require UDF values to be entered in order to submit time
-
Default Value - N/A - field should no longer functional
-
-
Instruction - N/A - field should no longer functional
-
Requires Unique - N/A - field should no longer functional
-
Web Applications - Drives where the UDF values can be entered and edited and by whom
-
Approval - Client Approver via Harmony Time Approval Application
-
Time Card Entry - BTE Admin via Timecard in the TMC
-
Web TimeSheet Entry - Employee via Harmony Web Time Entry Application
-
-
Click Submit to be returned to the Edit Template screen.
-
To add additional fields, select Add New Definition on Edit Template screen.
-
Once all Field Definitions have been created, click Submit on the Edit Template screen to be returned to the Template List.
-
-
-
Edit Mappings
-
Next to the Template Name, click Edit Mappings
-
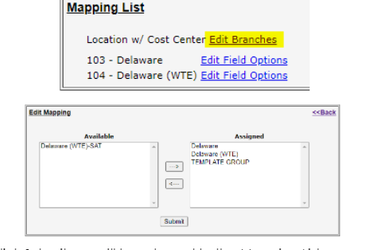
Click Edit Branches to assign the UDF template to specific Branches/Groups.
-
Move Branches from Available - Assigned to add the template
Only those Branches where Allow User Defined Fields is checked on the Branch Edit will be available for selection
Only one UDF Template can be assigned to a Branch
-
Click Submitto be returned to the Mapping List screen.
-
-
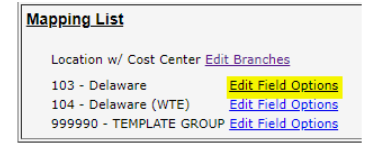
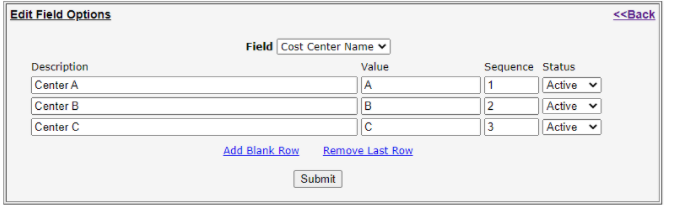
If the UDF Definition Control Type = Dropdown, click Edit Field Options next to a Branch to configure the list of values available for selection in the dropdown for that specific Branch.
-
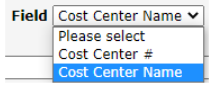
Field - Select the Field Definition from the dropdown - only those fields where Control Type = Dropdown are available for selection.
-
Description - the value that will be displayed in the dropdown.
-
Value
-
Sequence - Order in which the Descriptions are displayed in the dropdown.
-
Click Submit to be returned to the Mapping List. Click Back in the right corner to return to the Template List.
Field Options must be configured specifically for each Branch - they do not copy from Branch to Branch.
-
-
-
-
The UDF nows display with the configuration for Web Time Entry Assignments.
Best Practices/Common Solutions
-
Templates can be configured at the Branch-level:
-
Enable UDFs on the Branch: Go to Branch > Edit > Switches > Check Allow User Defined Fields.
-
Click into the Branch and go to Maintenance > Administration > User Defined Entry Fields.
-
-
Templates can be assigned to specific Clients within Branches.
-
UDFs must be enabled at the Branch-level.
-
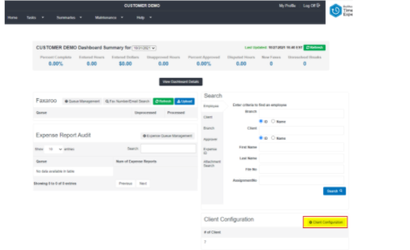
From the Call Center Dashboard, go to the Client Configuration section and click on Client Configuration.
-
Search for the Client Name and click Select. This opens the Client Level Settings screen for that specific Client.
-
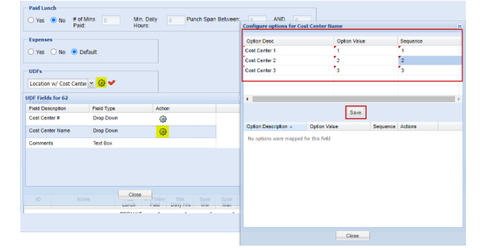
In the UDFs section, use the dropdown menu to select the UDF template to be assigned to the Client.
-
Click the cog icon next to the selected UDF to configure the UDF for the Client.
-
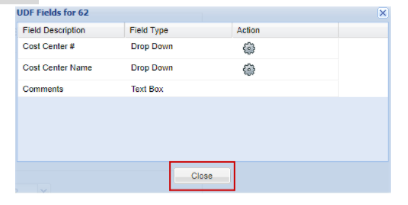
If the UDF Definition Control Type = Dropdown, click on the cog icon in the Action column next to the Field Description to add Field Options.
-
Click Save. The Field Options added move to the bottom of the Configure Options screen for the UDF, indicating that they have been applied.
-
Click on the
 icon to delete a Field Option.
 -
Click on the cog icon to edit a Field Option.
-
Click Close to return to the list of UDF Fields within the UDF template.

-
-
-
Click Close on the UDF Fields window to be returned to the Client Level Settings screen.
-
Click Save.
-
The UDF displays with the Client-specific configuration for Web Time Entry Assignments associated with the Client.
-